:: [홈페이지 만들기 기초] css로 칼럼 만들기 <div class=row>과 <div class=column></div> 넣기

div 를 이용해서 두개의 칼럼을 만드는 코드이다. 그리고 css 에도 아래와 같이 코드를 넣어주면 완성이 된다.


<div class=”row”>
<div class=”column”></div>
</div>

css 코드에는 아래와 같이 넣는다.

정확히 두개의 칼럼이 50% 되려면 아래와 같다.
.column {float: left; width: 50%;}
.row:after {content: “”; display: table; clear: both;}

양쪽의 칼럼 사이즈를 다르게 하려면 아래와 같이 넣어보자.
.column {float: left;}
.left {width: 25%;}
.right {width: 75%;}

모바일에서의 사이즈를 조정하려면 아래의 코드를 넣는다. (create a responsive two column layout)
@media screen and (max-width: 600px) {
.column {width: 100%;}
}


3개의 칼럼을 만드는 방법은 아래와 같다.

<div class=”row”>
<div class=”column”></div>
</div>

css 코드이다. 3개 칼럼이 모두 같은 사이즈로 보이려면 아래와 같이 넣는다.
.column {float: left; width: 33.33%;}
.row:after {content: “”; display: table; clear: both;}

3개의 칼럼이 다른 사이즈로 하는 방법은 아래와 같다.
.column {float: left;}
.left, .right {width: 25%;}
.middle {width: 50%;}

:: [홈페이지 만들기 기초] css 에서 테이블 꾸미기 <table>과 <tr>, <td> 넣기

홈페이지 제작시 도표를 정리할때 테이블을 많이 사용하는데 <div> 태그외에 <table> 을 여전히 많이 사용하게 된다.

css 에서 테이블을 꾸미는 방법을 올려보았다.

아래 코드는 <head> 와 </head> 사이에 넣거나 style.css 에 넣으면 된다.

<style>
table{border-style: solid; border-width: 3px; border-color: #000000;}
tr, th {font-size: 24px; color: #ffffff; font-weight: bold; background-color: #111111; padding: 6px;}
td {font-size: 16px; color: #336699; padding: 6px; border-style:dashed;}
</style>

[홈페이지 만들기 기초] Go Back 버튼의 여러가지 코드 – 크롬 브라우져에서 안될때 사용가능한 방법

현재 페이지에서 한페이지 뒤로 가려할때 흔히 사용하는 코드는 아래와 같다.

<button onclick=”history.go(-1)”>Go Back</button>

<input type= ‘button’ onclick=’javascript:history.go(-1);return false;’ value=’Back’>

하지만 위의 코드는 크롬 브라우져에서 안되는 경우도 있다. 그럴때는 아래의 코드를 사용하여 해결할 수 있다.

<a href=”<?php echo $_SERVER[‘HTTP_REFERER’] ?>”>Go Back</a>

<a href=”<?php echo $_SERVER[‘HTTP_REFERER’] ?>” class=”btn btn-primary”>< Go Back</a>

<button onclick=”location.href='<?php echo $_SERVER[‘HTTP_REFERER’] ?>'” type=”button”>Go Back</button>

<input type=”button” onclick=”location.href='<?php echo $_SERVER[‘HTTP_REFERER’] ?>’;” value=”Back” />

홈페이지 제작시 해당 페이지를 다른 페이지로 redirect 하기

홈페이지를 제작할때 이미 만들어진 페이지를 새로운 툴을 이용해서 다시 제작할때가 있다. 이미 구글 검색에 이전 URL 링크로 목록에 나타나 잘못된 링크로 클릭하면 문제가 생길 일이 종종 생긴다. 그럴때 유용한 팁이다.

Old 파일주소를 만들어 아래 코드를 넣어보자. head 부분에 이동할 url 을 넣어 강제로 페이지를 redirect 시키는 방법이다.

크롬(Chrome browser) 브라우져 풀스크린(Full Screen)으로 바꾸기

크롬 브라우져나 기타 다른 브라우져를 앱으로 사용할때 특히 URL을 보여주고 싶지 않을때 풀 스크린으로 바꾸어 주는 것이 완성된 앱으로서의 기본적인 사항일 것이다.

다음은 크롬 브라우져를 풀스크린으로 바꾸는 방법이다.

  1. 키보드에서 F11  키를 누르면 바로 풀스크린으로 바뀐다.
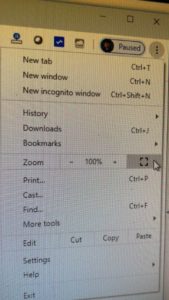
  2. 브라우져 맨위 오른쪽 끝에 점 3개를 크릭하면 옵션메뉴가 나오고 중간에 사각형 아이콘을 클릭하면 풀스크린으로 바뀐다.
크롬옵션오픈
크롬옵션오픈
크롬풀스크린 옵션
크롬풀스크린 옵션
  1. 아래의 자바스크립으로 위의 #1, #2를 하지 않고도 풀스크린으로 바꿀수 있다.<script>

    function myFullFunction() {

    var docElm = document.documentElement;
    if (docElm.requestFullscreen) {
    docElm.requestFullscreen();
    }
    else if (docElm.mozRequestFullScreen) {
    docElm.mozRequestFullScreen();
    }
    else if (docElm.webkitRequestFullScreen) {

    docElm.webkitRequestFullScreen();
    }

    }

    </script>

<body onload=”myFullFunction()”>


하지만 위의 코드가 문제가 될수 있다. 테이블릿이나 전화기 또는 크롬북 등에서는

“Failed to execute ‘requestFullScreen’ on ‘Element’: API can only be initiated by a user gesture.”

즉 어떤 이벤트라도 만들어야만 제대로 작동할 수 있는 것이기 때문이다.

아직 특별히 다른 방법은 찿지 못했지만 아래의 방식으로 워크어라운드 할 수 있지만 권장하지는 않는다.


function toggleFullScreen() {
if (!document.fullscreenElement) {
document.documentElement.requestFullscreen();
} else {
if (document.exitFullscreen) {
document.exitFullscreen();
}
}
}

document.addEventListener(“keypress”, function(e) {
if (e.keyCode === 13) {
toggleFullScreen();
}
}, false);

즉 앤터키나 리턴키를 다시 클릭해야만 하기 때문이다.


이렇게 풀스크린에서 다시 일반모드로 돌아갈려면 위의 #1 혹은 #2 를 하거나  마우스 커서를 브라우져 스크린 맨위쪽으로 옮기면 다시 정상모드로 돌아 갈수 있는 X자 표시를 클릭하면 된다.


Tag : HTML


  1. CODE RESULT
    <table border=”1″ bgcolor=”#cccccc”>
    <tr>
    <td> Hello
    </td>
    </tr>
    </table>
    Hello


  2. CODE RESULT
    <table width=”160″ border=”1″>
    <tr>
    <td width=”50%” align=”center” bgcolor=”blue”>
    Hello1 </td>
    <td width=”50%” align=”center” bgcolor=”green”>
    Hello2 </td>
    </tr>
    </table>
    Hello1 Hello2
  3. CODE RESULT
    <table width=”160″ border=”1″>
    <tr>
    <td width=”50%” align=”center” bgcolor=”blue”>
    Title1 </td>
    <td width=”50%” align=”center” bgcolor=”green”>
    Title2 </td>
    </tr>
    <tr>
    <td align=”center”>
    Hello1 </td>
    <td align=”center”>
    Hello2 </td>
    </tr>
    </table>
    Title1 Title2
    Hello1 Hello2
  4. CODE RESULT
    <table width=”160″ border=”1″>
    <tr>
    <td width=”100%” align=”center” bgcolor=”blue” colspan=”2″>
    Title </td>
    </tr>
    <tr>
    <td width=”50%” align=”center”>
    Hello1 </td>
    <td width=”50%” align=”center”>
    Hello2 </td>
    </tr>
    </table>
    Title
    Hello1 Hello2
  5. CODE RESULT
    <table width=”160″ border=”1″>
    <tr>
    <td width=”50%” align=”center” bgcolor=”blue” rowspan=”2″>
    Title </td>
    <td width=”50%” align=”center”>
    Hello1 </td>
    </tr>
    <tr>
    <td align=”center”>
    Hello2 </td>
    </tr>
    </table>
    Title Hello1
    Hello2
  6. CODE RESULT
    <table border=”1″ style=”background-color:orange;border:1px dotted black;width:160;border-collapse:collapse;”>
    <tr style=”color:white;background-color:red;”>
    <td style=”padding:10px;align:center;width:50%”>
    Title1 </td>
    <td style=”padding:10px;align:center;width:50%”>
    Title2 </td>
    </tr>
    <tr style=”color:white;background-color:green;”>
    <td style=”padding:10px;”>
    Hello1 </td>
    <td style=”padding:10px;”>
    Hello2 </td>
    </tr>
    </table>
    Title1 Title2
    Hello1 Hello2


error: Content is protected !!